Building a Calibration Table in Ezchrom (with screenshots)

This is a quick guide on how to build a calibration table in Ezchrom.  This should work in both Ezchrom Elite as well as Openlab Ezchrom.


1.  Have your method(s) that you would like to use saved and ready.  This first step is pretty straightforward.  You want to have a good idea of what your method parameters will be before you start building your calibration table.

2.  Set up a sequence of runs with your calibration standard(s).  In my example, I am using three levels of calibration.  If you expect your samples to be within a certain range, you want to select standard concentrations that will cover that range.  So, if my samples will have a concentration in a range of 50-75 ng/ul for example.  Then I would want to choose standards at 30, 60, and 90 ng/ul, perhaps.   Whichever calibration levels you choose to have, make sure you have them ready and know which vials they are in, and designate that in your sequence table.
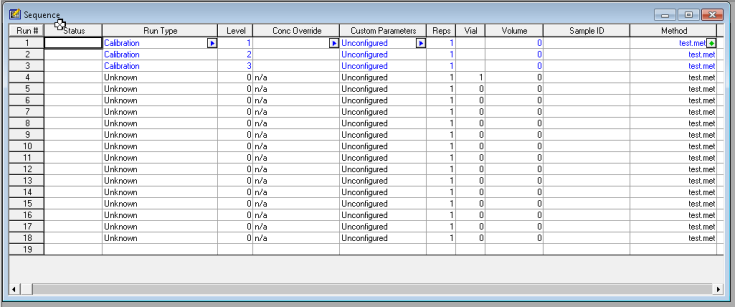
2017-10-10_7-21-11

3. Integrate your peaks.  Make sure you have the proper channel selected at the top, for the chromatogram that you want to adjust.  Next select integration events, the two values you want to focus on at first are threshold and width.  You can keep clicking analyze to see how your changes affect the integration.  It’s more or less a trial and error approach.  There are several other options you can continually add to your integration table to fine tune your chromatogram.
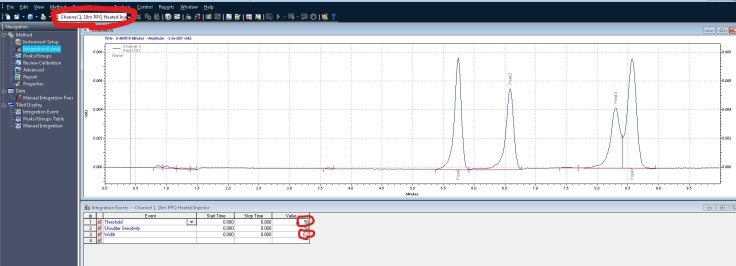
Inked2017-10-10_7-24-46_LI

In this example, I would like to remove some non peaks at the start of the chromatogram.  I can click on integration off, on the bottom of the screen.  It then wants you to click on the chromatogram where you want to start the cut off:
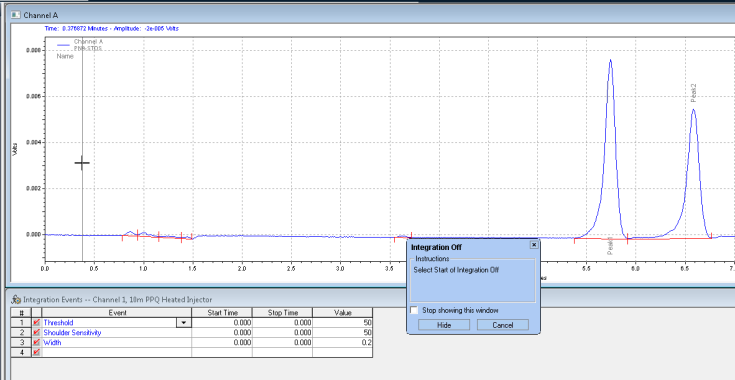
 

2017-10-10_7-24-56

Next it wants you to click where you want the integration off event to stop:
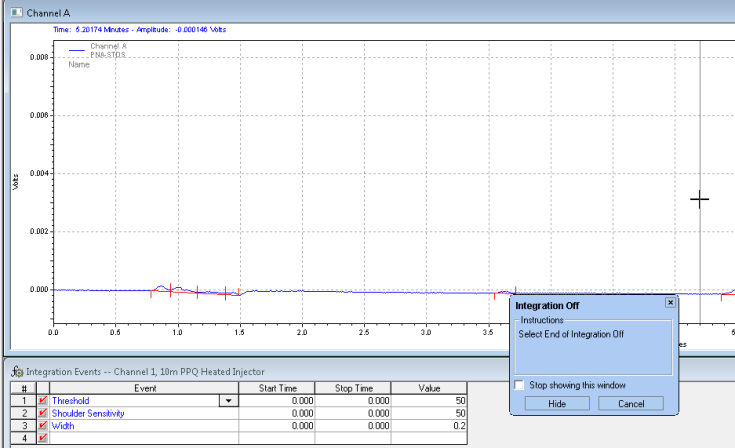
2017-10-10_7-25-04

After you analyze, you get the chromatogram with the unwanted peaks removed:
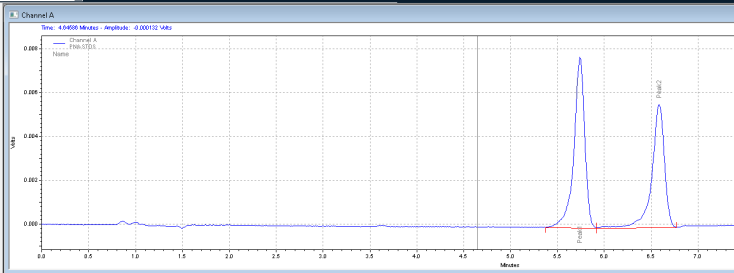
2017-10-10_7-25-58

4.  Calibration.  After integrating your signals, the next step is calibrating.  Peak selection can be done graphically on the chromatogram.  You can click on the icon to define peaks, click at the start of the peaks, then click at the end of the peaks.  The peak table will come up, and you can name the peaks, and designate their concentrations.

2017-10-10_7-26-18

Save these changes to your method, and the software will now calculate the amounts of your unknowns based on your calibration table!
Chemstation Concepts Explained: File Structure

(Note: This only applies to revs of chemstation after B.02.01(?) all the way up to current revs of Openlab Chemstation.)

I thought I would make a series of blog posts centered around different Chemstation topics.

This post’s topic is file structure.

A common problem that arises from not knowing the file structure of Chemstation would be the analyst makes some integration or calibration changes, and those changes are saved to the method, but they appear to be lost the next time they run their samples.  “Chemstation is not saving my changes!”, one might shout out.

Chemstation uses the standard windows file structure to organize methods and other files.  These files can be found in C:\Chem32\1(or 2, 3, or 4)\(Methods, Sequences, or Data).  The three main folders that I want to discuss are:

Methods

Sequences

Data

The Methods folder is where your methods are stored.  A method is just a collection of setpoints that will be used during the analytical run.  So things like temperature, flow, length of the run, calibration info, etc.  These all get saved into a folder, that will have a .M at the end:

1.png
Sequences are saved in the Sequences folder.  A sequence is just a collection of methods that you can organize to have Chemstation run them one after the other.  This file ends with a .S.
2.png
The Data folder is where you can find all of your data signals, reports, a copy of your method, among other things.  This folder ends with a .D.
mydata
Now that you know the main file types, let’s talk about how Chemstation processes and manipulates these files.
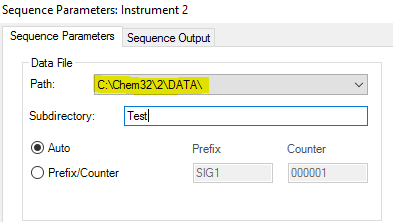
When you create a sequence table, you tell Chemstation what methods you would like to run.  In Sequence Parameters, you tell Chemstation where you want to store your data:
sequence parameters
In this example, I will be storing my data in Chem32\2\data\test.
Sequence Container (or result set):
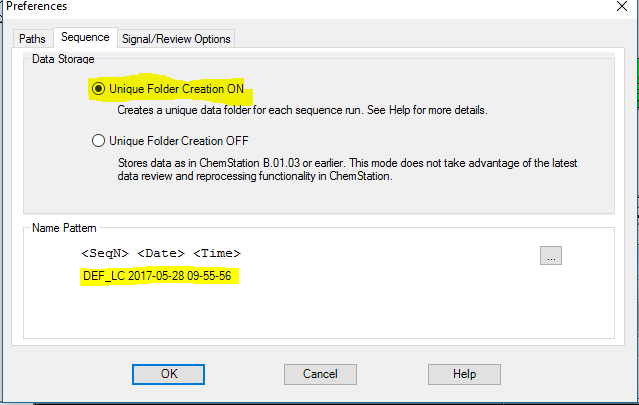
If you go to View then preferences in method and run control of an online session, you can find the following window:
unique folder creation
This information only applies if you have Unique Folder Creation ON.  What this will do is create a sequence container to put in your data folder, and it will name it according to your name pattern highlighted above.
When I go to run that sequence, as soon as I push the Start Sequence button, the software make a copy of the method you have stored in the Methods folder, and puts that copy in the sequence container.  It also copies your sequence file from your sequence folder.
From this point on, any changes you make will only be applied to the copy that was placed in the sequence container, in your data folder.  And they will NOT be applied to the original method and sequence files located in the Methods and Sequences folder.  The original method is referred to as the master method, and the copy placed in your sequence container is referred to as the sequence method.
So when you are analyzing your data in chemstation, if you look at the top of the screen, chemstation will let you know if you are using the master, or the sequence method.  This is indicated by the word sequence in parenthesis:
Use sequence method
There is also a drop down highlighted above that needs to be selected as well.
So now, if I want to change my integration parameters, or my calibration, or even my report settings, when I click on save method, it will only save to the sequence method.  When I go to run a new set of samples, chemstation will use the original master method, which hasn’t been affected by any of these changes.  In order for any changes to be made to your master method, and subsequent runs in the future, you need to tell chemstation to updated the master method with your changes.  This is acheieved by simply going to the Method menu item and selecting update master method.  Now any changes that have been made WILL be applied to future runs.
Really what I wanted to do here was talk about how the chemstation file structure can dramatically affect workflow.  If the user understands sequence vs master method, this can make things much easier!
Have any comments, questions, concerns?  Please leave a comment below, would love to hear your thoughts!

Clock watchdog timeout fixed! Windows 10.

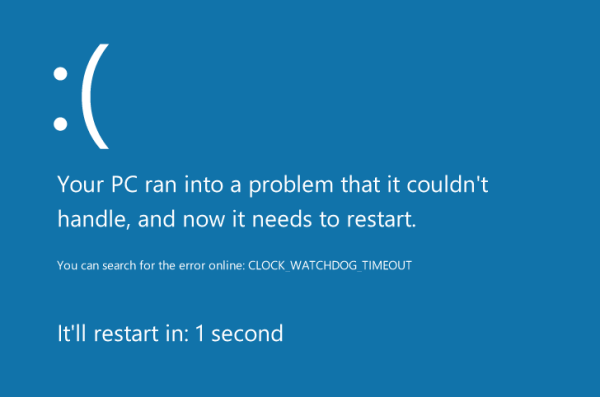
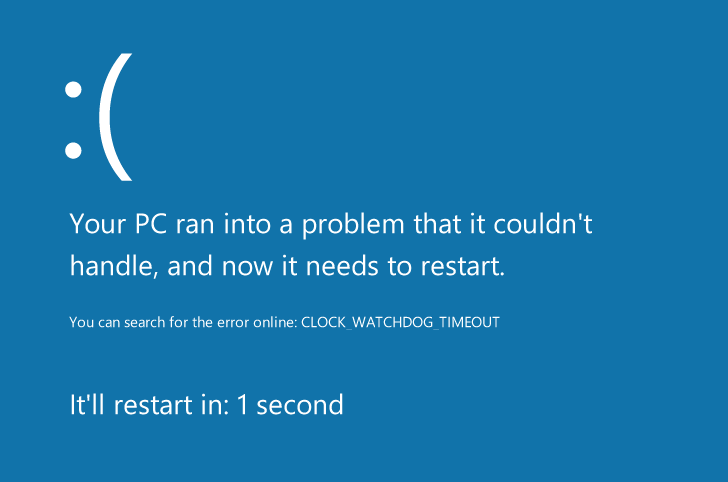
Recently,  an older PC that I use kept getting “clock_watchdog_timeout” blue screen of death,  and shutting down.  I noticed this error would happen shortly after bootup, maybe five minutes.

The blue screen of death, with sympathetic sad face.

Many fixes online like such as here, and here, mainly pointed me in the direction of drivers and software.   In my case,  the fix was hardware,  and was relatively easy. 

The fix: 

The problem was that my CPU fan built plenty of dust below the fan blades,  causing my CPU to overheat after a few minutes.   All I needed to do was clean out the dust and that problem hasn’t come back now for over a week

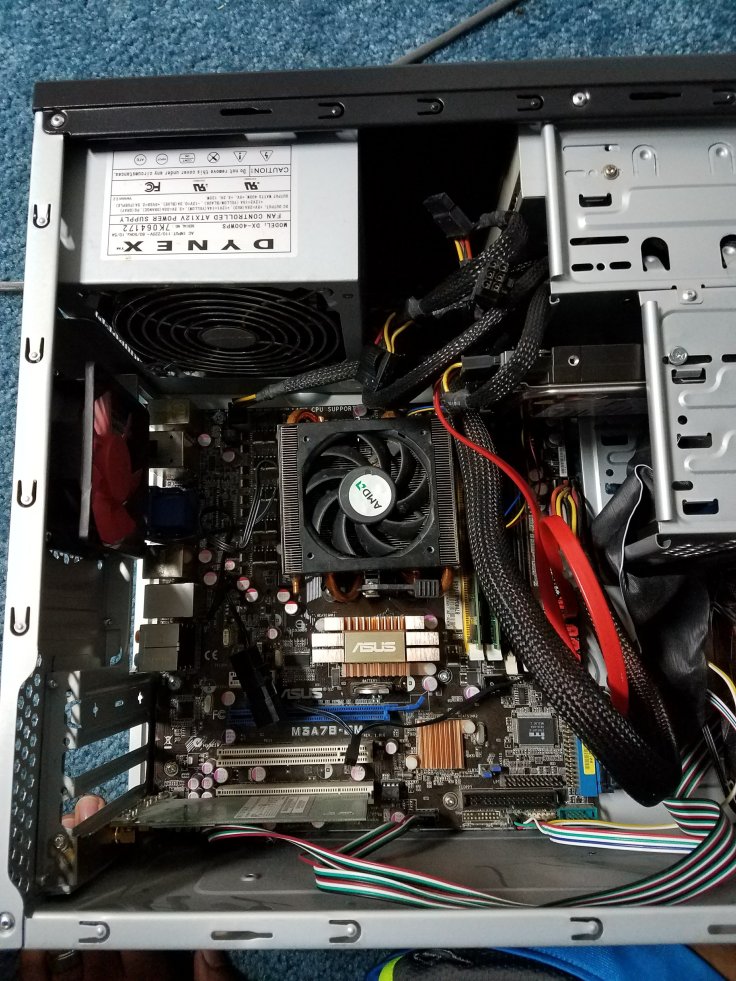
Side of my pc with the cover off. CPU fan is visible towards the middle.

I took the side cover off to access the fan. 

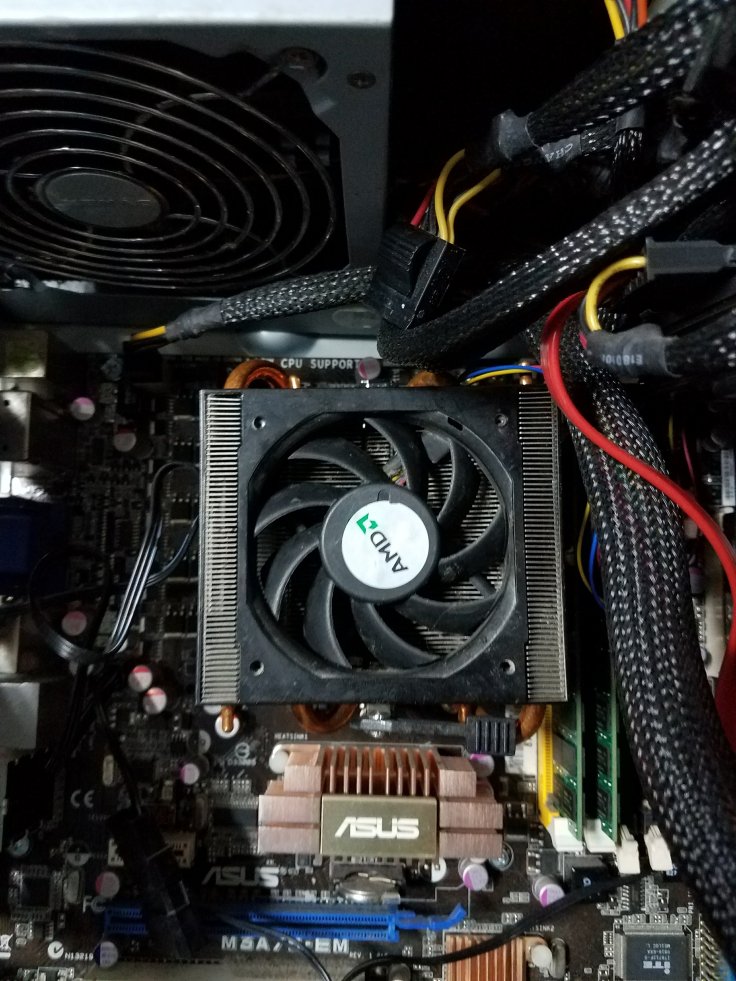
Below the fan blades is where the dust accumulated.

 In the pucture above you can see the fan.   Unfortunately, I didn’t take a picture before cleaning it so that you can see all the dust.  To clean it, I’m sure a standard air duster would work, but I didn’t have one handy.  I completely removed the fan,  there were four screws securing it to the motherboard, and used several q-tips dipped in a little bit of water.  This allowed me to gently scoop out as much dust as possible.  

After that,  I put the fan back,  and the problem was fixed!   I hope this fix may help you with your issue, please leave a question or comment below!

Nurture Vs. Nurture? My thoughts on CRISPR and what it may mean for our future.


Yes, it has been a while since I’ve posted.  My intention is to change that.  I’m also deviating from a troubleshooting post, to one about my thoughts on CRISPR.  CRISPR-CAS9 (or Cpf1) is an exciting new technology that has the scientific community buzzing.  In basic terms, with this technology, scientists can modify the DNA in a cell, allowing it to cut out certain sequences, or activate certain sequences.  For instance, if there is a “typo” in a cell’s DNA, causing it to propagate a genetic disease, it can be corrected using this technology.

The possibilities with this technology seem endless.  Mosquitios that carry malaria can be made sterile, which has the potential to save one million people a year from dying.  The problem of cancer looks to be closer to an answer, this technology can be used to make better T cells, to effectively fight cancer.  The first human trials have already started on lung cancer patients in China.

But its not just used for the treatment of disease.  It can be used in food to make it grow faster, possibly larger as well.  It can also be used to enhance plastic eating bacteria in landfills.  There really are a wide array of uses for CRISPR.

However, could this be used to alter human embryos, to say, give some one genes to make them tall, muscular, intelligent?  Or dictate their skin pigmentation, hair type, eye color?  Is that something we would want to do?  What if we could control everything that nature predisposes us with?  That’s the idea behind the title of this article, Nurture vs Nuture.  We can essentially remove “Nature” from the equation.  Genetic engineering has always been a controversial, deeply ethical issue.  CRISPR only makes that engineering easier and faster.  Then there’s the issue of trying to fix one disease, only to cause an unexpected consequence.  A famous example of a useful disease is sickle cell trait, a genetic disease where some red blood cells make a “c” shape instead of a circular shape.  Sickle cell trait comes with mild symptoms and some risk, especially if two people with the trait have children, their children could get sickle cell anemia, which is more serious.  Sickle cell trait, could potentially be cured through genetic engineering, however the disease provides immunity for malaria.  So curing large populations from this disease, would be exposing them to a more deadly disease.  Just about everything is seemingly interconnected.  Changing food, or bacteria, or even our genes to solve one problem, could potentially introduce something into the environment that is far worse.  CRISPR was recently used to combat the HIV virus, but the virus quickly learned a way to combat CRISPR.  What if there was a drug resistant bacteria (super-bug), that could also build immunity to CRISPR  (“super-duper-bug”)?  Something like that could be deadly for large populations

Does that mean the scientific community should shun this technology due to it’s potential dangers?  Absolutely not.  But I think something like this should be highly regulated and monitored.  If we can cure cancer, and other terrible diseases, then that’s great.  But I think we should draw the line at trying to unnaturally enhance humans, both physically and mentally.  Also, this technology in the wrong hands could be disastrous, think: Bioterrorism.

These are just some of the challenges associated with this revolutionary technology, that I’m sure brighter and more influential minds than myself are thinking about and working through.  The future is certainly looking bright, but for the time being I will maintain a cautious optimism.

Can’t Communicate with my Instrument (GC or LC)!

2016-05-01_18-28-36


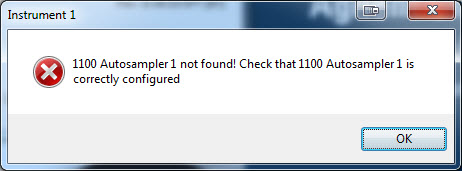
There’s nothing like  preparing your samples and starting chemstation, only to see “instrument offline”.  There are some basics that can be checked that may be the solution if you are having this problem.

IP addresses:

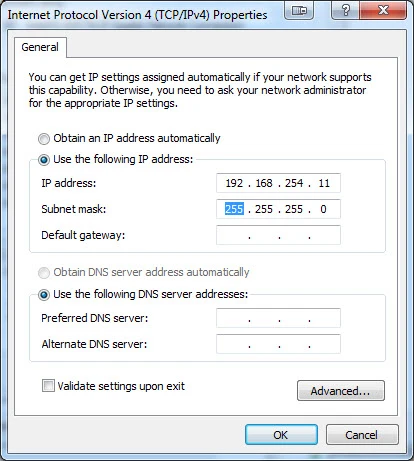
You always want to start here.  A 68/7890 GC, as well as 1100-1290 LCs use LAN communication for the most part.  The main idea being, is the ip address of the instrument and the ip address of the pc compatible?  You want the ip address to match up until the last set of numbers.  For example:  if the gc is 10.1.1.101, the pc needs to be 10.1.1.x.  If the LC is 192.168.254.11, the pc needs to be 192.168.254.x.  With “x” being any digit from 1 to 255.

How can I check the ip address of the GC?  This is pretty simple, on the majority of these GCs you can find out by hitting options, then communication on the gc front panel.  From here you can see what the address currently is, and you can also change it as well.

The LC is not as straight forward, but the default is 192.168.254.11.  You can also connect the gameboy to the module and view/edit the ip address.  If it’s not the default, and you are not sure what the address is, then you will have to go through a process of changing switches on the LAN card and setting it to default.  From there you can keep the default or change to a new address using Telnet.  I may write an article on that procedure in the future.

How can I check the ip address on the pc?  You can do this through the control panel of windows, then go to network and internet, then network connections.  You can see all your network connections on this screen.   Most people will have two connections, a “house” or company network, and a local area connection.  The local are connection is usually the one that is connected to the instrument.  Right-click on that connection, then double click on IPv4.  You will see a screen like this:

2

From here you can view and change the IP address.  Make sure to keep the subnet mask: 255.255.255.0.  Hit OK to save the changes.

After determining that the addresses are compatible, the next thing you want to do is ping the instrument.  To do this you need to launch the command prompt.  In Windows 7, click on the Start key for windows, in the search bar type CMD and hit enter.  In Windows XP, hit start, and select run, type CMD and hit enter.

Once in the command prompt type: ping 10.1.1.101 (or whatever the ip address of the instrument is).  You should get 4 replies back, 100% packets sent and received.  If not, then check that the cable from the pc to the insturment is connected and good, maybe try swapping it out.  If there is a switch or hub in between make sure that port is operational.  If there are 2 LAN cards on the pc, its possible that you are connecting to the wrong one, or changed the ip address on the wrong one.  Does the LAN card on both the pc and instrument show flashing LED lights on the port?  If not it may be a hardware problem with one of the cards.


Configuration: 

If pinging the instrument was successful, the last piece of the puzzle is ensuring the configuration in chemstation has the proper ip address for the instrument.  If you are using a classic version of chemstation (pre-Openlab), go to start, all programs, agilent chemstation, and launch the configuration editor.  From here you can view/edit the ip address of what chemstation thinks the instrument is configured to be.  In Openlab chemstation, launch the Openlab control panel, select your instrument on the left hand side, and click on configure instrument on the top of the screen.  From here you can view/edit the ip address of what Openlab is expecting your instrument to be configured to be.


I hope these basic steps of checking/pinging the ip address have been helpful.  Please leave a comment if you have any feedback or questions, thanks!


Forced Cold Restart on HPLC

Sometimes you might get strange errors on the HPLC modules.  This trick is called the forced cold restart, or factory reset.  Basically clears errors and resets set points on the module to the factory settings.  This is useful for strange oddball errors that may appear on the HPLC.  This works on many of the 1100 up to the 1260 modules.  On the back of the module, you will see a row of white dip switches, usually with the label CONFIG.  These switches are 1-8 starting from the left.

Take note of the exact arrangement of the switches currently, so that you can revert them back to the way they were when you are finished.  Turn off the module.  Make switches 1,2, and 8 up, and every other switch down.  Turn on the module for a few seconds, then turn it off.  Return switches to the original configuration.  Forced cold restart complete.

Clear GC local memory (6890,7890)

Sometimes the method stored on the actual GC, not the software, can become corrupt.  It may cause you to see strange, nonsensical errors.  In this case you may need to clear the local memory, and reset the GC to the default settings, while preserving the ip address and the configured inlets and detectors (things configured as AUX may need to be reconfigured).

To reset the memory, turn off the GC.  Hold the Clear button, turn on the GC while still holding the Clear button.  Continue to hold the clear button until the GC powers on completely.  Memory reset complete.

HPLC No Flow!

It happens sometimes that the HPLC pump is on and pumping,  but there is no flow coming out.  If you have an air bubble somewhere in the tubing, you will notice that its either not moving, or just moving back and forth.  The very first thing you can try, is just opening the purge valve, and pumping at 5ml/min to get an air bubbles out.

Also, you want to check your solvent bottles, make sure there is solvent there.  If you are using solvent filters on the ends of your lines, make sure they are not clogged.

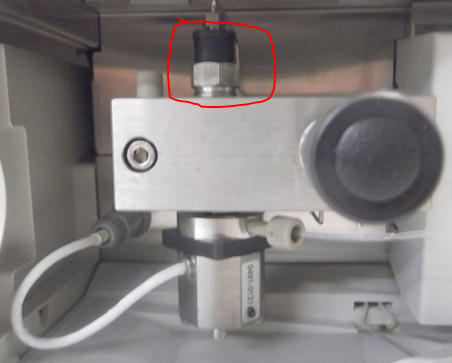
After checking that, you can try loosening the line going into the active inlet valve:

2

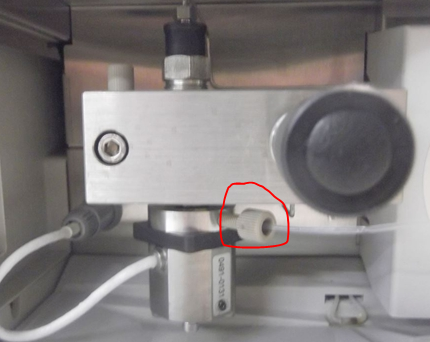
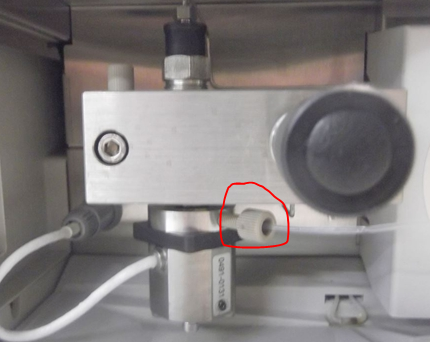
Sometimes just relieving the pressure here can solve the issue.  If not, you will want to remove the outlet ball valve.  There is capillary on top of the valve that must be loosened and removed first.  Then you can remove the valve.

1

Sometimes the pump can get air locked and just needs to be “burped”.  Removing this valve and running the pump will allow it to release any air that may be trapped.  You will see a small well where the valve was sitting.  You want to make sure that the well fills up with solvent with the pump on.  If not, you problem may actually be the Active inlet valve.  That valve has a cartridge that can get clogged, or it could be the actual valve itself.  Replace the cartridge first, then replace the valve if that doesn’t help.

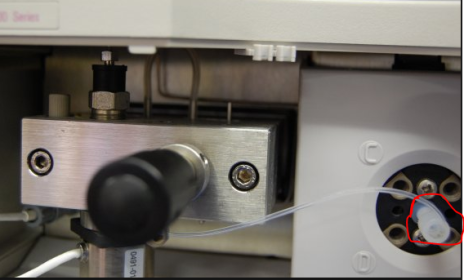
This procedure will work for Agilent 1100\1120\1200\1220\1260 Binary\Quat\Iso pumps. For Quat pumps you also want to make sure that the MCGV isn’t blocking solvent from reaching the active inlet valve.  You can remove the line that goes in the middle of that MCGV and just place it inside a beaker of solvent.

3

Turn on the pump and see if there is any change.

These procedures assume that the pump is actually moving.  You can usually tell just by hearing the pump mechanism moving when you turn the pump on.

Extracting a Signal from Spectral Data

If you collected spectral data in your run and would like to extract a wavelength from that data, you can follow these steps below.

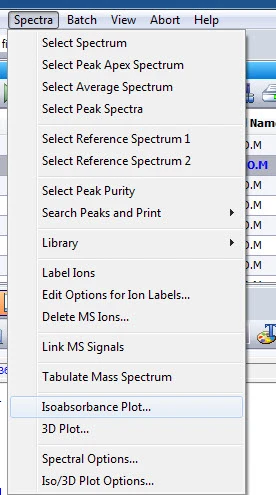
First, load your data file.  Next, select Spectra then Isoabsorbance plot.

1

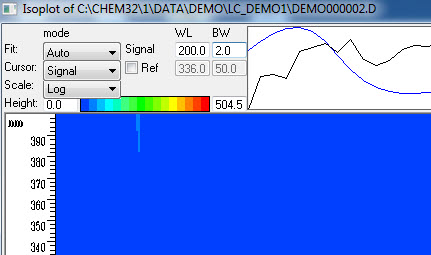
On the upper left box on the screen you want to change Cursor to Signal.  Then select the wavelength you would like to extract.  In this example I chose wavelength 200.  You can also specify a reference signal and bandwidth as well if needed.

2

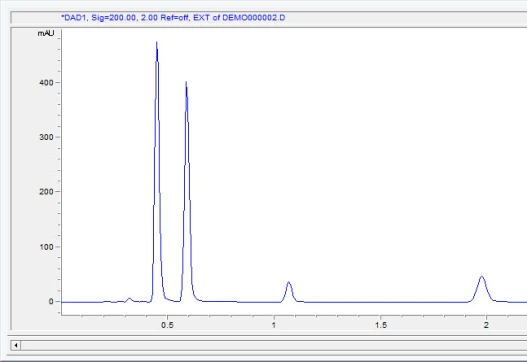
After selecting the desired signal, push copy at the bottom then hit ok.  You may get a pop-up message about temporary data, you can hit ok to that as well.  You will now see your chromatogram for the signal you extracted.

4

How to Build a Calibration Table in Chemstation (with screenshots)

This will be a quick tutorial on how to build a calibration table in Chemstation, with screenshots.  The first thing that you want to do is run your standards.  Most of the time you want to have 3 levels; low, medium, and high.  You want your compound of interest to have a concentration close to the mid-range level.  For example, if my samples will typically have a concentration of 50 ng/ul, then my standards could be 25, 50, and 75 ng/ul.  Some people might have five or more levels, others might just have one level.

Next step is integration, you want to be sure that your peaks of interest are all integrated, and you can filter for unwanted peaks (possible blog post about that process).

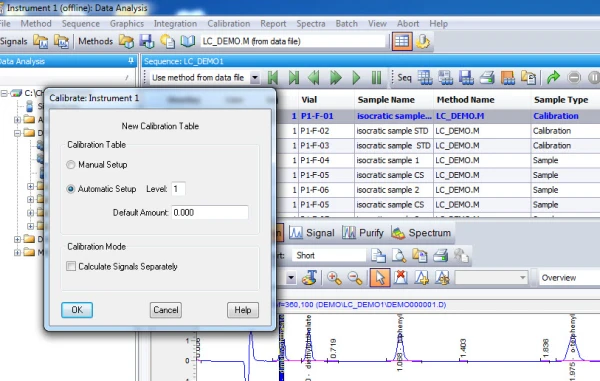
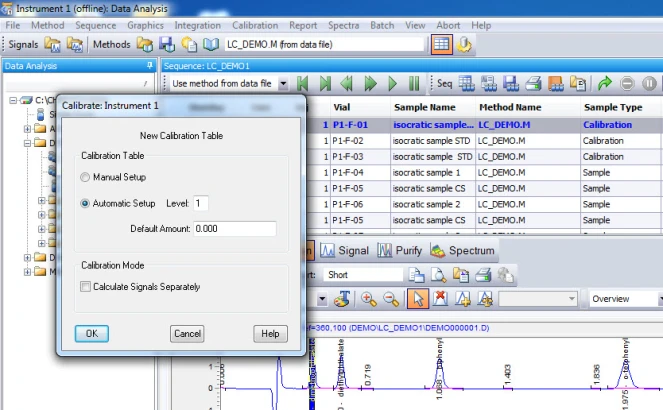
After running your standards, and integrating, the next step would be to select calibration, and new calibration table.

2015-09-18_20-28-43

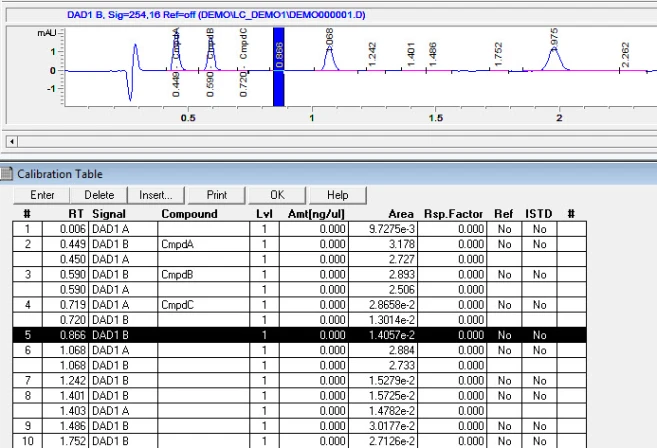
I usually leave the settings with the default and hit ok.  Now, every single peak that was integrated earlier will show up on your calibration table.  Unwanted peaks can be removed by keeping zero as the amount.

2

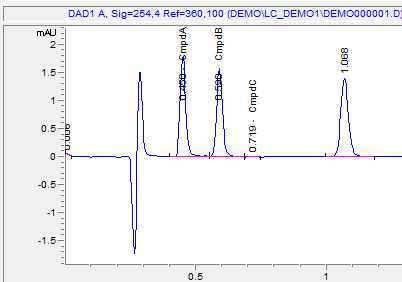
You can tell the integrated peaks by the pink line beneath the peak and the retention time label above it.

3

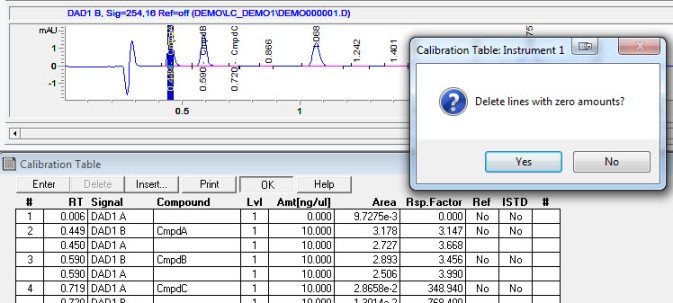
At this point, when you click on each line, you can see which peak you are on and give it a name and an amount.  Again, the units for amount are totally customize able.  I had a post about this earlier.

4

After adding the amount, hit ok, and chemstation will delete line with zero amounts.

5

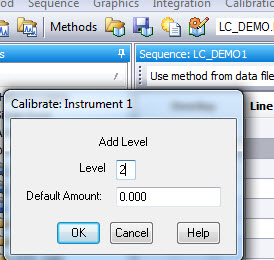
The peaks now have the name that you specified above them.  Load your level two calibration run, go to calibration and select Add Level.

6

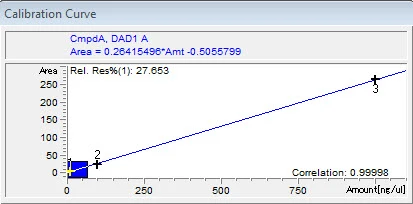
Do the same thing this time, you’ll only have to add the amount for each peak with each subsequent level.  After adding all of your levels, you can look to the right of the calibration table and see the calibration curve, equation, and r value of each compound.

7

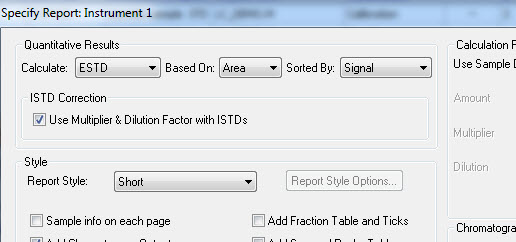
The calibration table is now complete.  Be sure to select the proper quantitative settings by going to report, then specify report.  For this type of calibration table you want to select ESTD based on area.

8

Blog at WordPress.com.

Up ↑